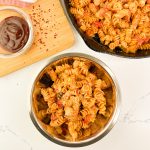
One Pan Chicken BBQ Pasta
A One Pan Chicken BBQ Pasta dinner loaded with bacon, chicken, cheese and a sweet and spicy BBQ sauce all cooked in one pan for easy clean up! Plus it's ready to eat in less than 30 minutes!
Servings: 4 - 6 servings
Ingredients
- 6 slices bacon (reserved 2 slices for garnish if desired)
- 1 small onion, finely chopped
- 2 cloves garlic, minced
- 1½ pounds boneless, skinless chicken breasts, cut into 1 inch cubes
- 2 cups unsalted chicken stock (or chicken broth)
- 1 14 ounce cand fire-roasted tomatoes with garlic
- ½ cup milk
- ¼ teaspoon red pepper flakes
- salt and pepper, to taste ,
- 1 12 ounce box rotini pasta
- ⅓ - ½ cup Sweet Baby Ray's Sweet and Spicy barbecue sauce
- 1½ cups shredded Cheddar Jack cheese
Instructions
- Cook the Bacon – Crisp the bacon in a large skillet, then remove and crumble. Leave about 1 tablespoon of grease in the pan.
- Sauté Onion and Garlic – Add onion and cook until soft, then stir in garlic and cook briefly.
- Brown the Chicken – Add chicken and season with salt and pepper. Cook until lightly browned (it will finish cooking later).
- Combine Ingredients – Add crumbled bacon (reserve some for garnish), stock, fire-roasted tomatoes, milk, BBQ sauce, red pepper flakes, and pasta. Stir well and bring to a boil.
- Simmer – Reduce heat, cover, and simmer for about 15 minutes, stirring occasionally, until the pasta is tender.
- Finish with Cheese – Stir in the shredded cheese and cook another minute or two until melted. Serve.
Notes
You can also skip the browning of the chicken step and use already cooked chicken from the grocery store or from your freezer. Just add the already cooked chicken in step four of the instructions.
