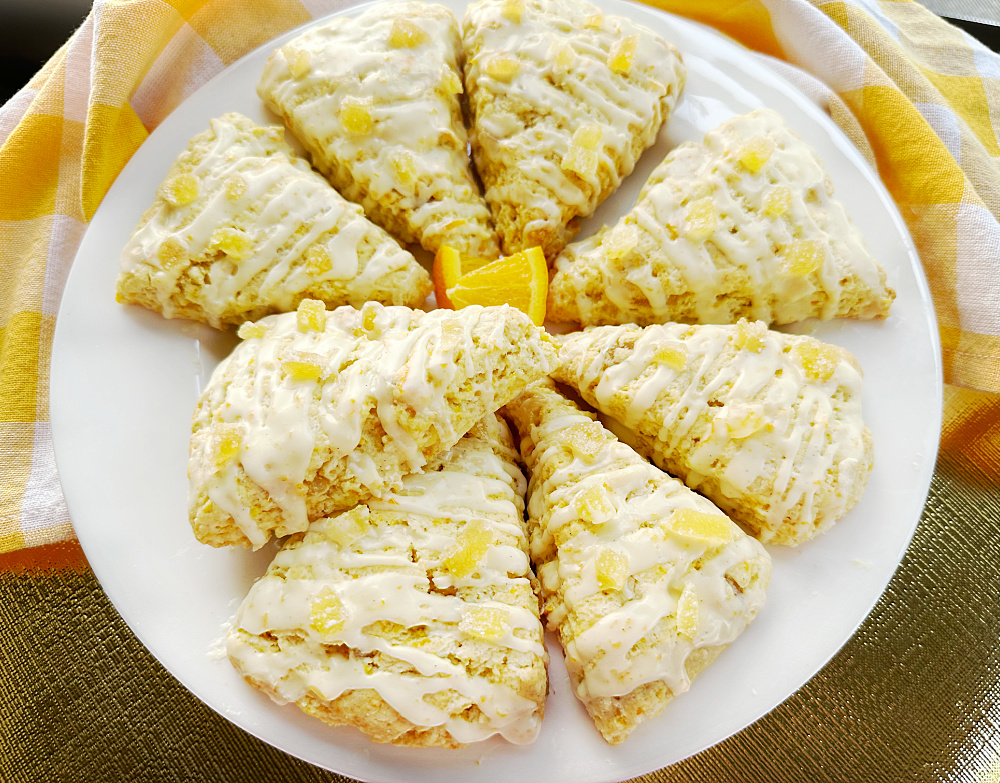
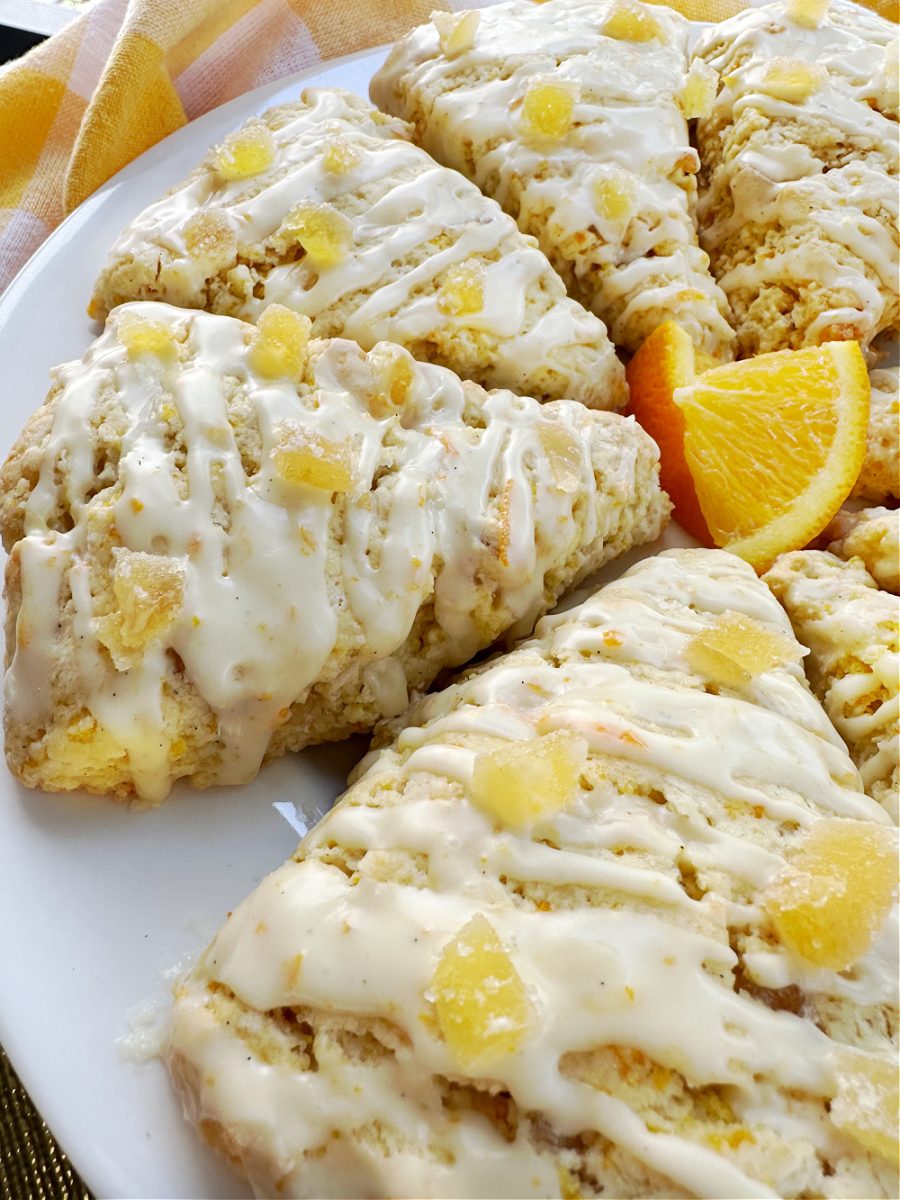
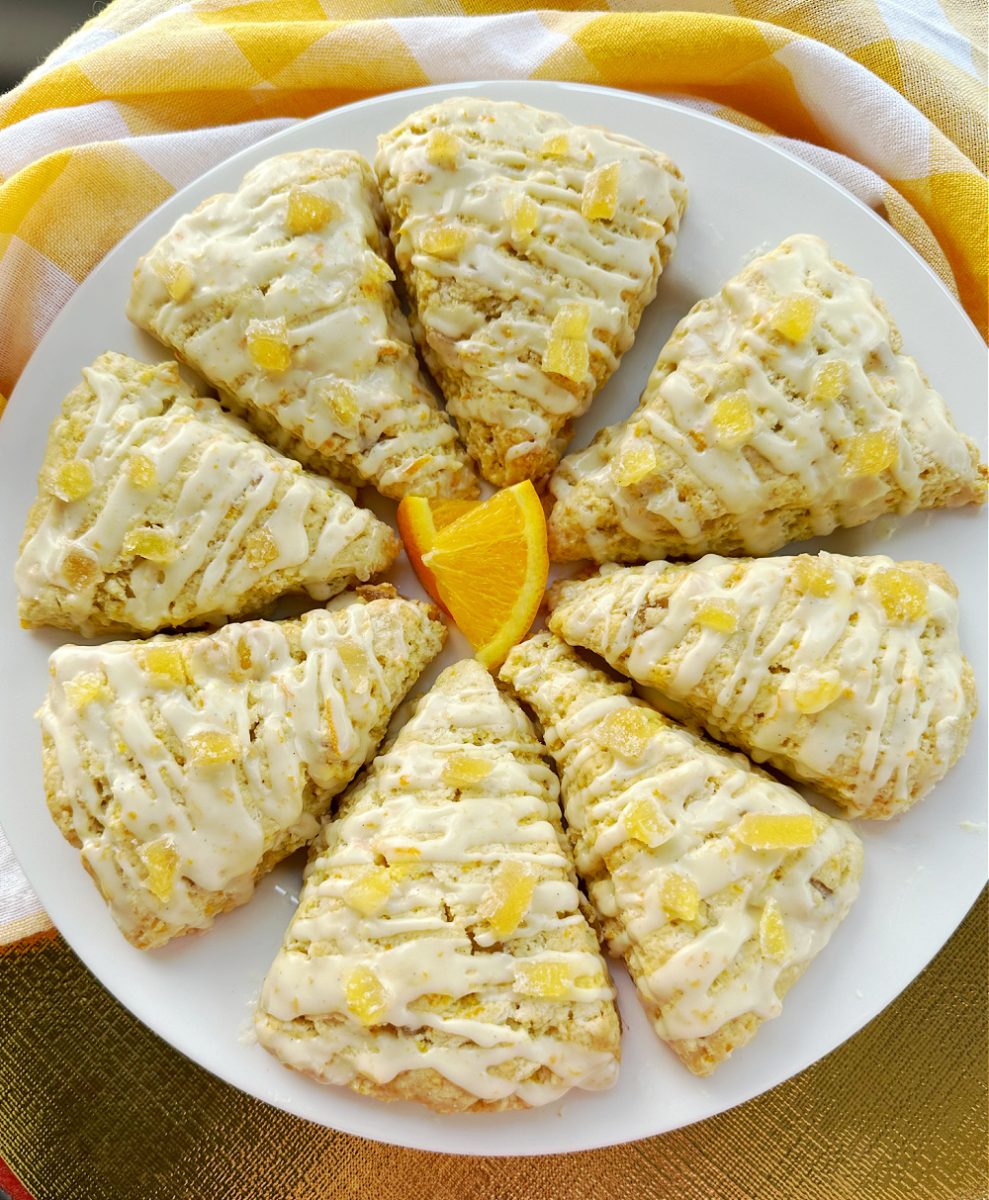
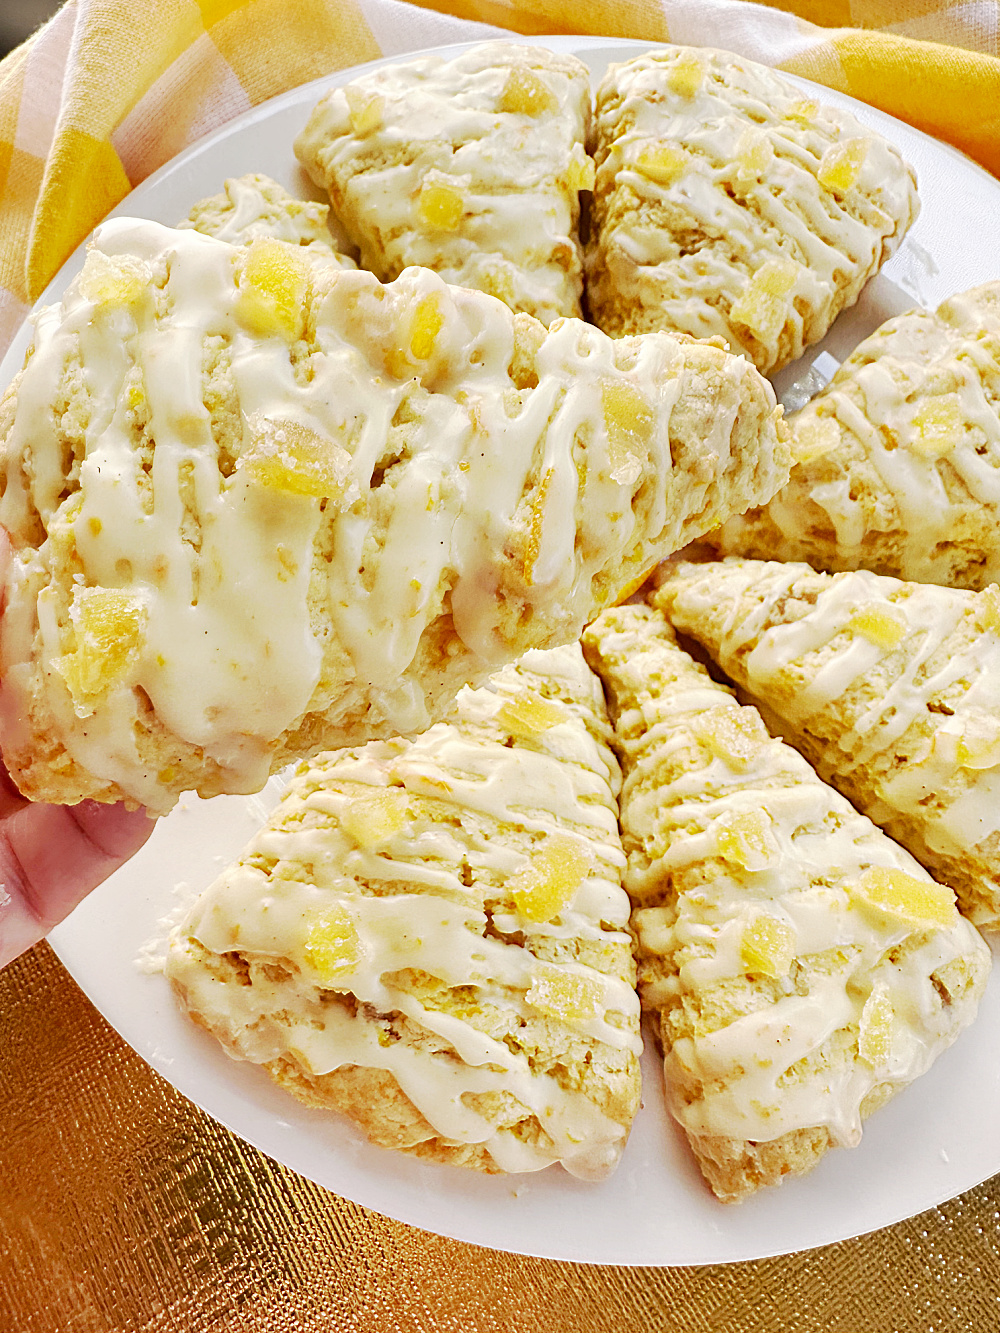
Candied Ginger Orange Scones
These Candied Ginger Orange Scones are tender, buttery, and filled with crystalized ginger and fresh orange zest. Topped with a delicious sweet and zingy orange glaze and more candied ginger, these scones are perfect to enjoy with your coffee or tea.

As these Candied Ginger Orange Scones came out of the oven, the aroma of a freshly baked scone hit me. I’ve used crystalized ginger when baking these lemon scones and fell in love with the zing of the candied ginger immediately. Infusing candied ginger and oranges takes these classic treats to the next level and offers a delicious balance of sweet and zesty flavors.
I’ve made candied ginger scones with orange like three times now and can’t get enough of them. The last batch I do believe I have perfected the exact amount of ginger and citrus flavor to satisfy my craving for that sweet and zesty in a baked good.
With any of my scone recipes, I always say “This is a perfect scone”, but truly this orange scone recipe with candied ginger is a perfect balance of flavors. That makes me happy,
This post may contain Amazon or other affiliate links. As an Amazon Associate, I earn from qualifying purchases. For more information, see my disclosure policy.
Candied Ginger Orange Scones
Many of my scone recipes are made with cold butter to keep the scones light and flaky, and this one does too.
The secret to making scones is that you must keep your wet ingredients cold. The butter is best frozen and then grated (still frozen) as I shared why in this post for lemon blueberry scones.
Grating the butter while it’s still frozen and then gently tossed into your dry ingredients also keeps the dough lighter as you’re not going to be overmixing the dough and allowing the butter to get warm. This process makes the best scones, especially when you add the orange and ginger flavors to the dough.
Alternatively, you can use very COLD butter cubes and then using a pastry blender tool “cut” the butter into the dough until it resembles course crumbs. You just need to be sure you don’t warm the butter up too much.
I love using this crystalized ginger (not sponsored) but in a pinch, I have also used candied ginger from my local grocery store. You can find it in the same aisle as the dried fruit. If you want to bump up that orange flavor, add a little of Orange Extract.
The recipe is super simple and these ginger orange scones are great for breakfast, brunch, or a mid-afternoon snack.
What is Crystallized or Candied Ginger?
Crystallized ginger is made from a fresh ginger root that has been peeled, cut into pieces, cooked in sugar syrup, and then cooled and dried. A sprinkling of coarse sugar gives the ginger its crystalline finish for a sweet and tangy treat.
Make sure you use cold ingredients
Keep the butter frozen until ready to use, and keep the heavy cream and egg cold. Cold ingredients prevent spreading in the oven and it gives it that crumbly, tender texture. If your ingredients are getting too warm, simply put them back in the refrigerator for 10-15 minutes.
Why do you need to rest your dough before baking?
This recipe calls for chilling and resting the scone dough prior to baking. Cold dough prevents the scones from spreading in the oven and helps them puff up a bit more.
How do you store scones?
Store baked and glazed scones in an airtight container at room temperature for 2 days and in the refrigerator for up to 5 days.
Make ahead and freezer instructions
If you want to make these scones in advance, it’s actually super simple to do so. Make the dough, cut the scones out, and set them on a parchment-lined sheet pan. Place the pan in the freezer and let the scones freeze until they’re solid. This will take a couple of hours.
Once they are frozen, place the scones in an airtight container or freezer bag and keep them for up to 3 months. When you’re ready to bake, just let them sit on the counter while your oven heats up to take the chill off. Then, bake as directed but add 2-3 minutes to the baking time.
Equipment
- Baking sheet
- Silicone baking mat or parchment paper
- Mixing bowls
- Whisk or fork
- Microplane (this is my favorite)
- Grater or Food processor
- Sharp knife or pizza cutter
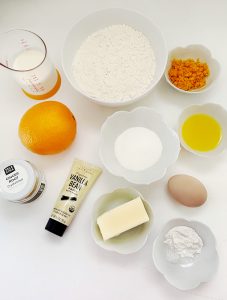
Gather your ingredients
For the scones:
- 4 tablespoons unsalted butter, frozen and grated (keep in the freezer until ready to use)
- 1 ¾ cup all purpose flour
- 2 teaspoons baking powder
- ¼ teaspoon kosher salt
- ½ cup chopped candied ginger
- ¼ cup sugar
- 1 tablespoon orange zest, grated from one large orange
- ½ cup heavy cream
- 1 teaspoon vanilla bean paste (or vanilla extract)
- 1 large egg
- 1 – 2 tablespoons fresh orange juice
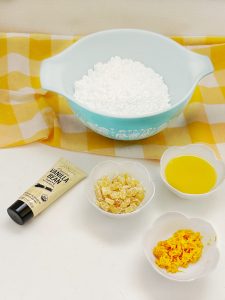
For the glaze:
- 1 ½ cups powdered sugar
- ½ teaspoon vanilla bean paste (or vanilla extract)
- 2 – 3 tablespoons fresh orange juice
- 2 teaspoons orange zest
- diced candied ginger pieces to top scones with
How to Make Candied Ginger Orange Scones
Step 1
Line a baking sheet with a silicone baking mat or parchment paper. Set aside.
Step 2
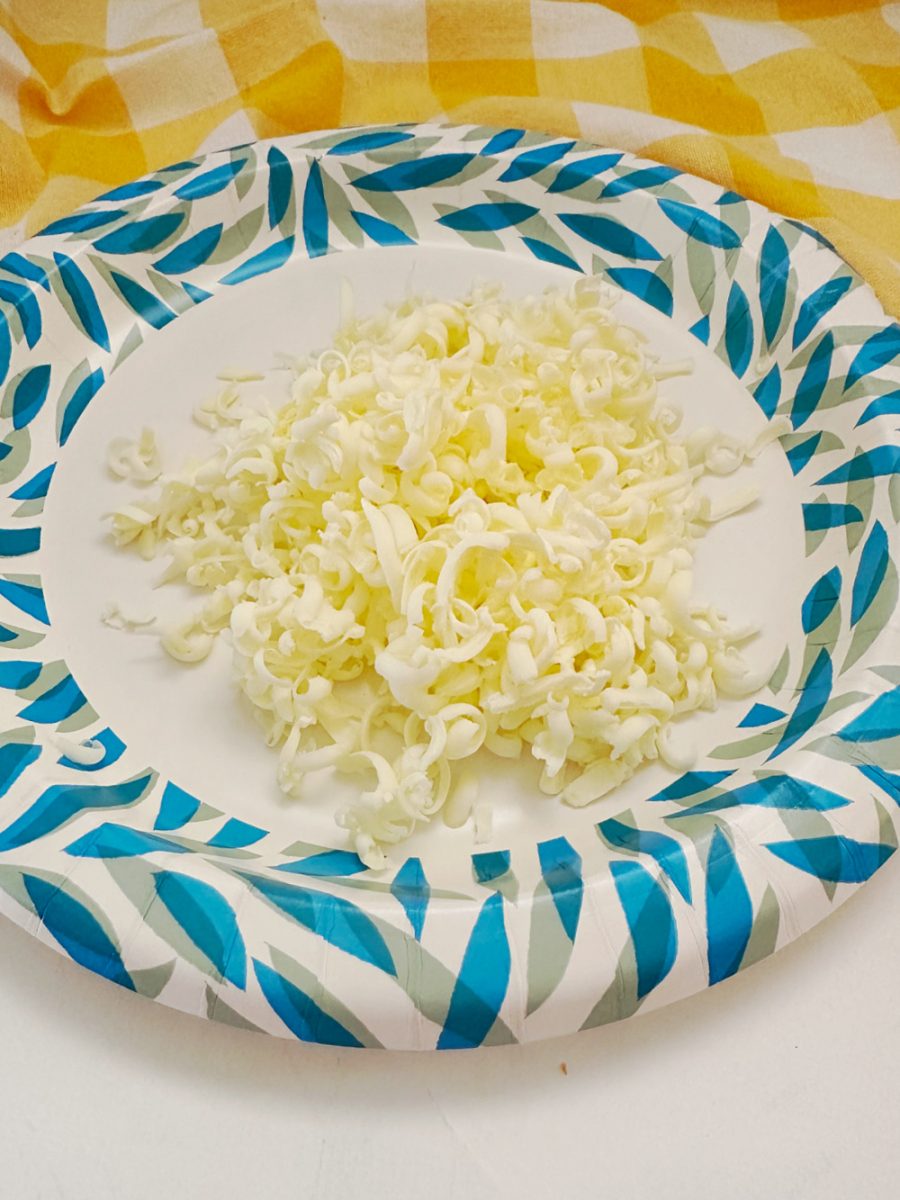
Grate the frozen butter with the large holes of a box grater and place the grated butter back in the freezer. Can also use a food processor.
Step 3
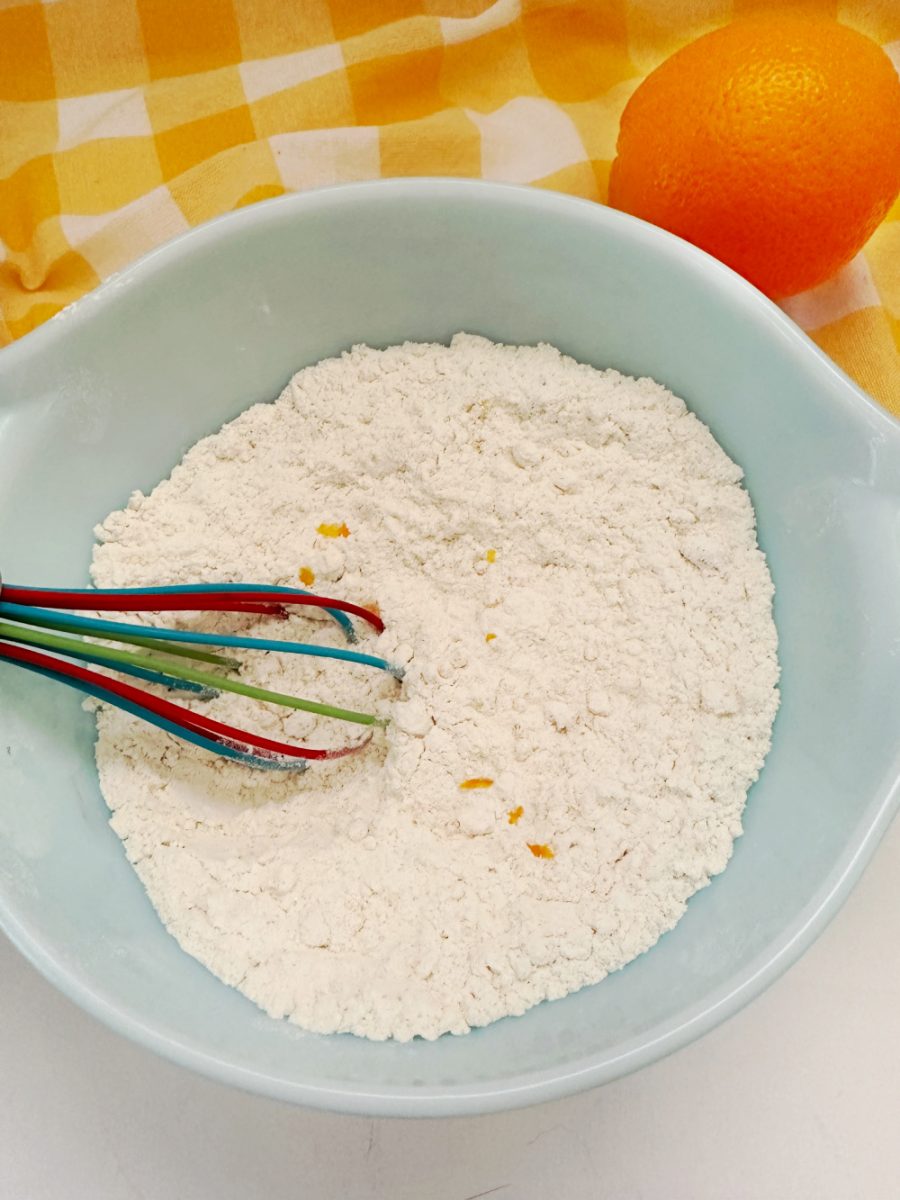
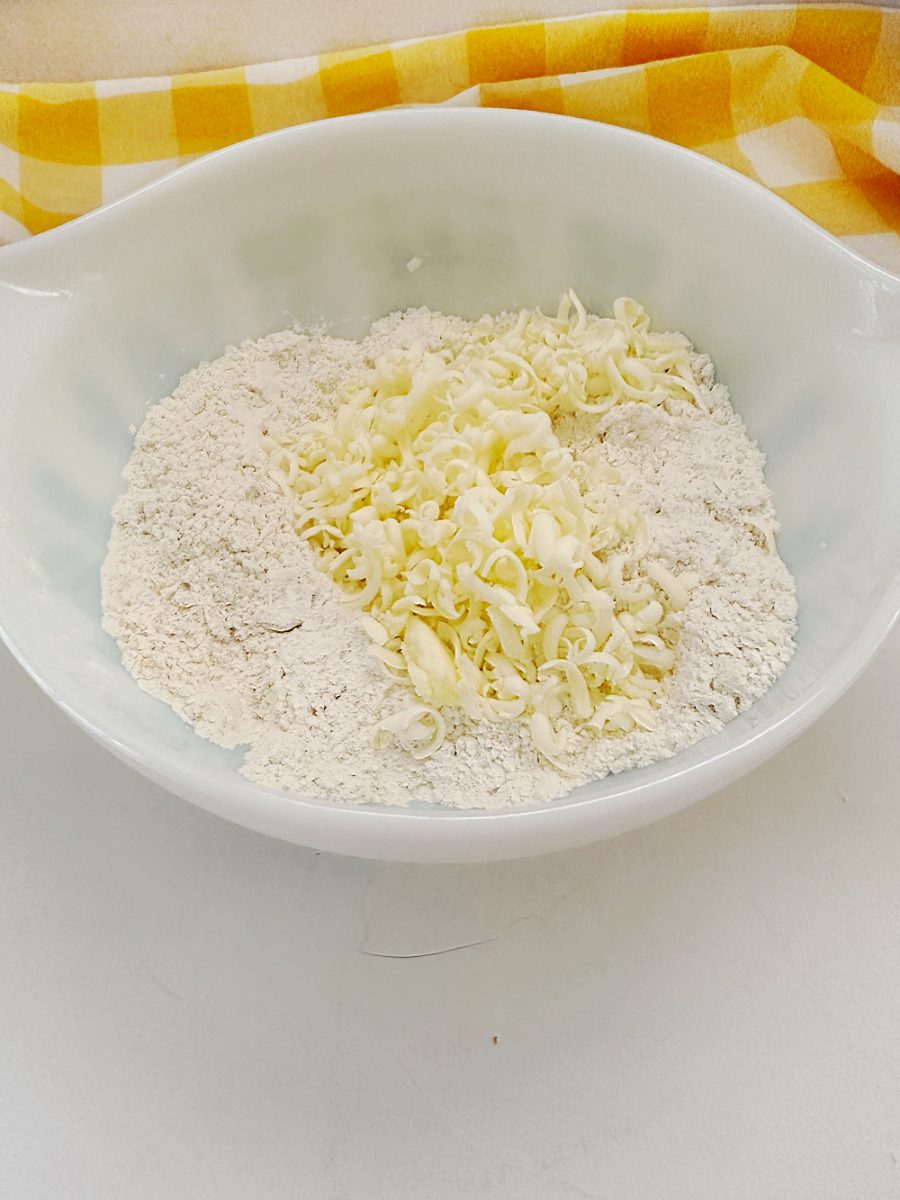
In a mixing bowl, whisk the flour, baking powder, salt, and candied ginger together. Set aside.
Step 4
In a small bowl, combine the orange zest and sugar. Using a fork, mix until combined. Doing this will help the zest distribute more evenly in the dough. Add the sugared orange zest to the flour mixture and give it all a good mix.
Step 5
Remove the frozen grated butter from the freezer and gently toss with the flour mixture.
Step 6
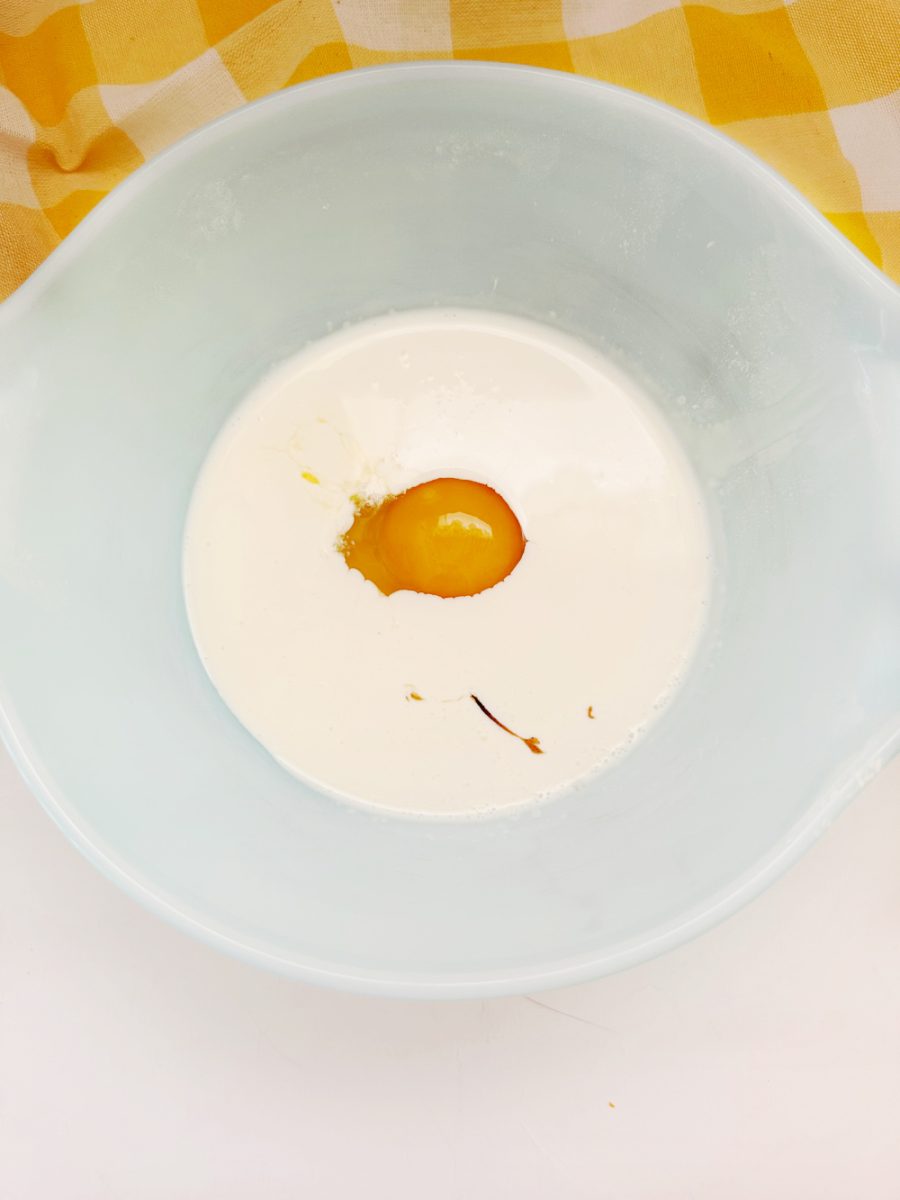
In another small bowl, whisk together the heavy cream, vanilla bean paste, egg, and orange juice.
Step 7
Add the egg mixture to the flour mixture. Using a fork, mix together until it forms a dough. Do not over-mix.

Step 8
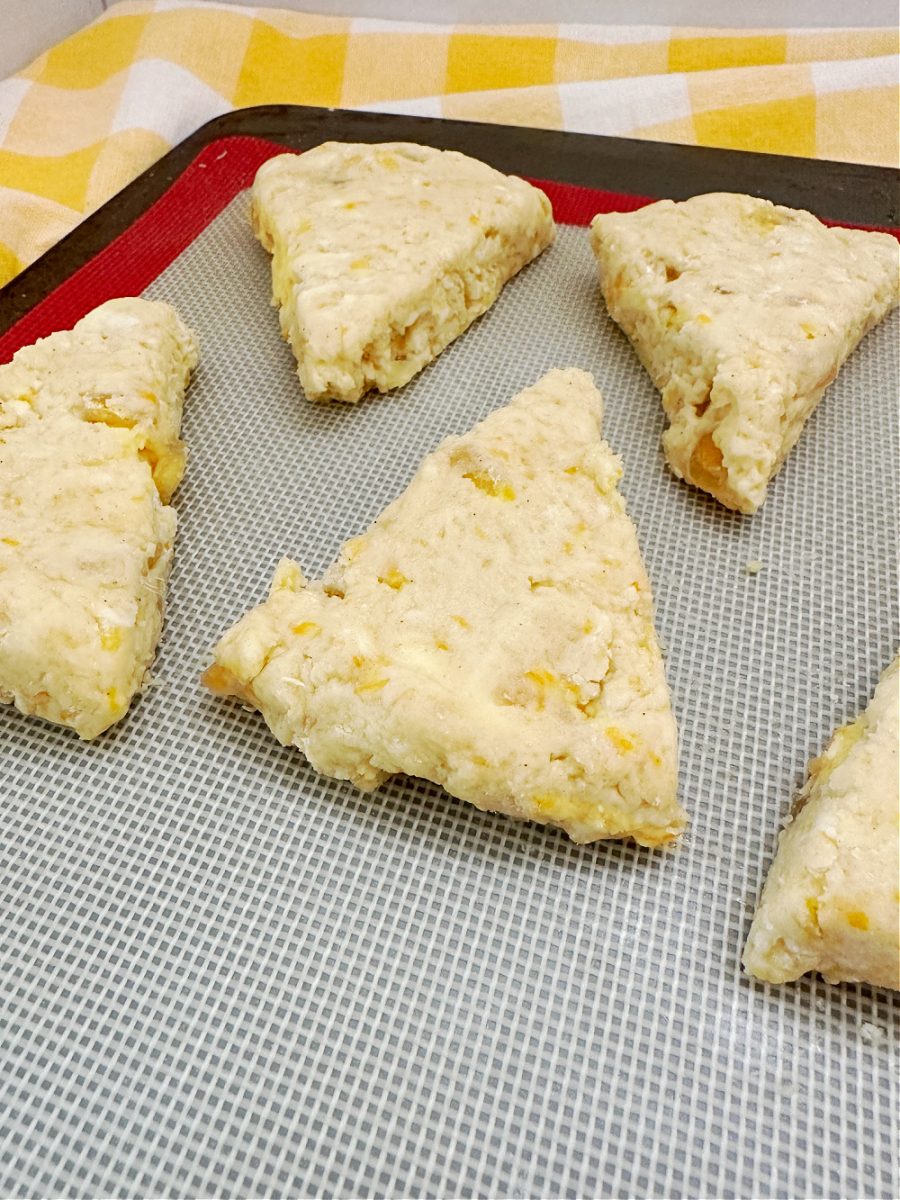
Transfer scone dough to the prepared baking sheet, and pat out the dough into a 7-inch circle about 1/2 inch high. Using a sharp knife or pizza cutter, cut the dough into 8 equal wedges (triangles).
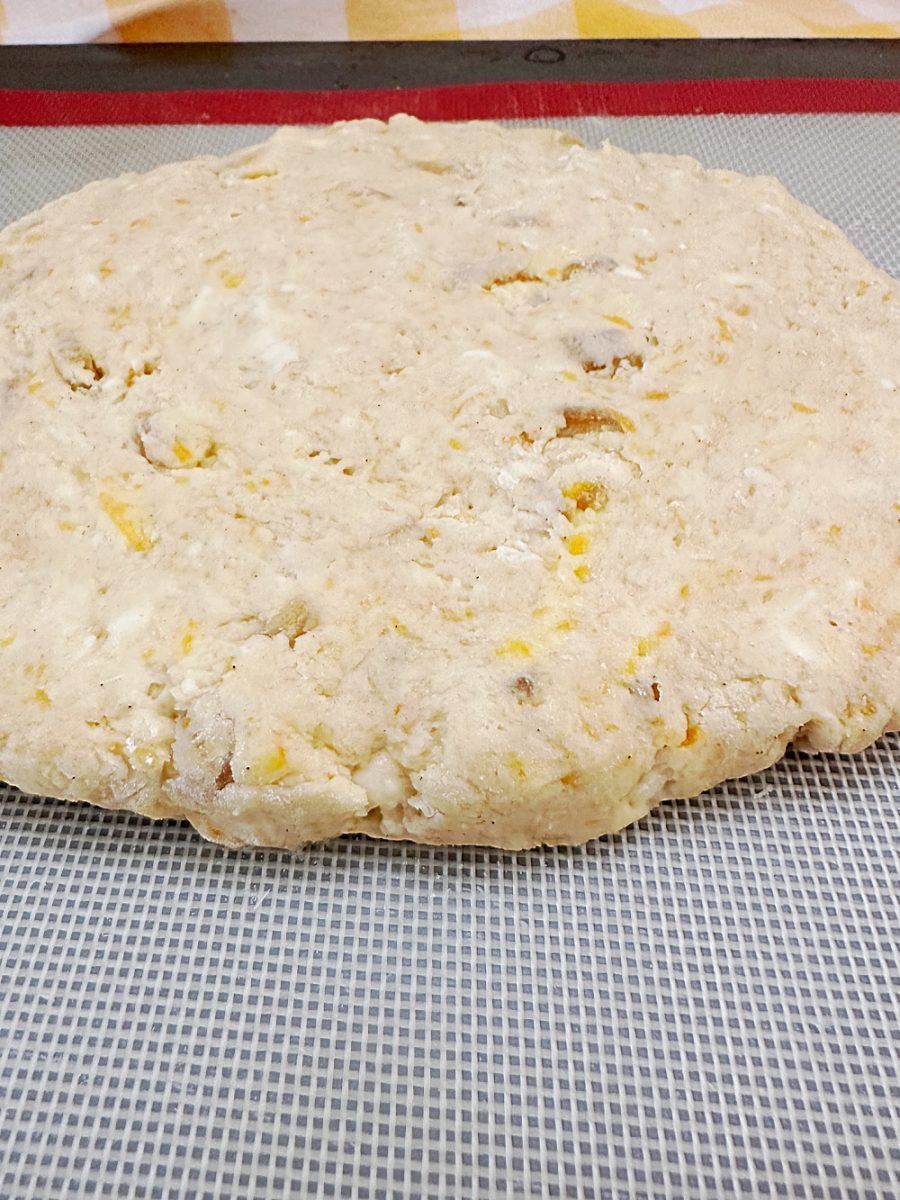
Step 9
Separate the scones a bit on the baking sheet and then place in the freezer for 10 minutes or refrigerator for 20. This is a good time to preheat your oven to 400 degrees.
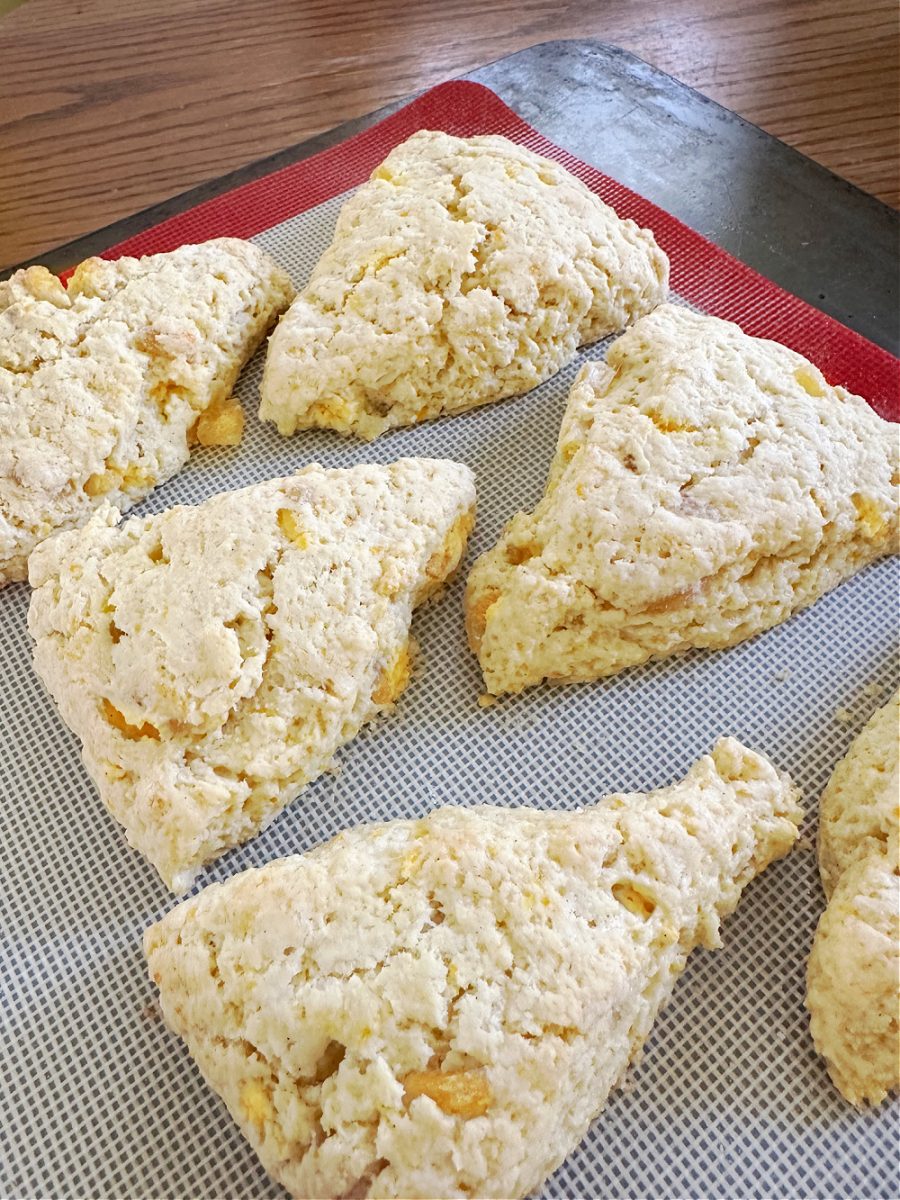
Step 10
Bake scones in the oven for 14 – 16 minutes, or until the bottoms are lightly golden brown. Remove from the oven and cool completely on a cooling rack before glazing.
Step 11
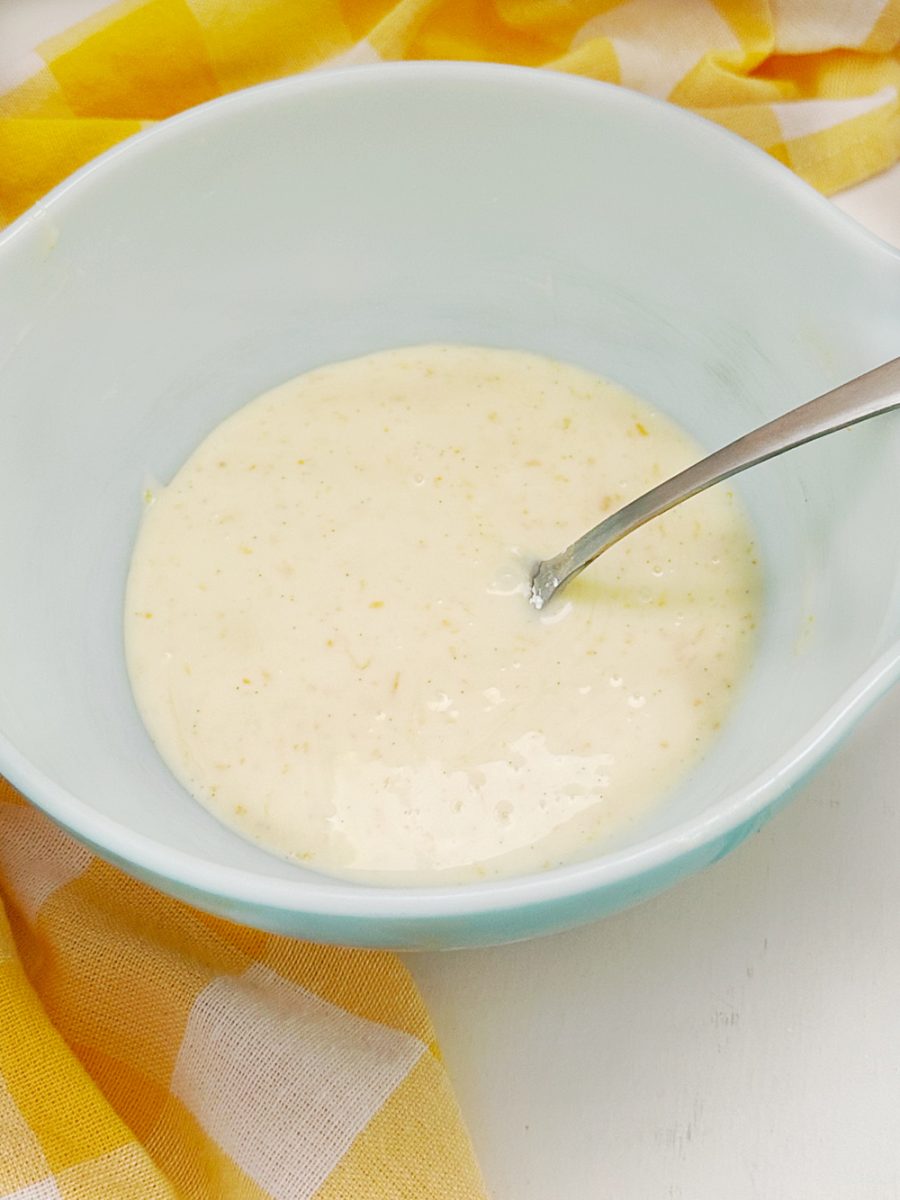
To make the glaze: Combine the powdered sugar, vanilla, orange zest, and juice in a small bowl and whisk till smooth. Add the chopped ginger pieces and mix again.
Step 12
Drizzle over the tops of the scones and allow to set a few minutes before enjoying.

Tips, Tricks, and FAQs
- The biggest tip here is the make sure your ingredients are COLD. Freezing and grating butter is a big trick to doing this.
- Use a Microplane grater to zest the orange.
- Chop the candied ginger into small pieces but not too small so that you can get a taste of the goodness.
- Do not over-mix the scone dough.
- If you use a biscuit cutter for the scones, do not “twist” the cutter from the dough. This will seal the edges and your scones won’t be as flaky.
- Same tip as above if you’re using a round cookie cutter.
- Try adding some bits of chopped dark chocolate to the dough. Orange and chocolate pair well.
Other scones recipes you will want to try
- Ham and Cheese Scones with Chives
- Pumpkin Spice Glazed Scones
- Lemon Poppy Seed Scones
- White Chocolate Raspberry Scones
Printable Candied Ginger Orange Scones Recipe
Candied Ginger Orange Scones
Equipment
- Silicone baking mat or parchment paper
- Whisk or fork
- Microplane zester
- Grater (or food processor)
- Sharp knife or pizza cutter
Ingredients
For the scone dough
- 4 tablespoons unsalted butter, frozen and grated (keep in freezer until ready to use)
- 1¾ cup flour
- 2 teaspoons baking powder
- ¼ teaspoon kosher salt
- ½ cup chopped candied ginger
- ¼ cup sugar
- 1 tablespoon orange zest, grated from one large orange
- ½ cup COLD heavy cream
- 1 teaspoon vanilla bean paste (or vanilla extract)
- 1 egg
- 1 – 2 tablespoons fresh orange juice
For the glaze
- 1½ cups powdered sugar
- ½ teaspoon vanilla bean paste (or vanilla extract)
- 2 – 3 tablespoons fresh orange juice
- 2 teaspoons orange zest
- diced candied ginger pieces to top scones with
Instructions
- Line a baking sheet with a silicone baking mat or parchment paper. Set aside.
- Using a grater (or a food processor), grate the frozen butter and place the grated butter back in the freezer.
- In a mixing bowl, whisk the flour, baking powder, salt, and candied ginger together. Set aside.
- In a small bowl, combine the orange zest and sugar. Using a fork, mix until combined. Doing this will help the zest distribute more evenly in the dough. Add the sugared orange zest to the flour mixture and give it all a good mix.
- Remove the frozen grated butter from the freezer and gently toss with the flour mixture.
- In another small bowl, whisk together the heavy cream, vanilla bean paste, egg, and orange juice.
- Add the egg mixture to the flour mixture. Using a fork, mix together until it forms a dough. Do not over-mix.
- On the prepared baking pan, pat out the dough into a 7-inch wide circle about 1/2 inch high. Using a sharp knife or pizza cutter, cut the dough into 8 equal wedges (triangles).
- Separate the scones a bit on the baking sheet and then place in the freezer for 10 minutes or refrigerator for 20. This is a good time to preheat your oven to 400 degrees.
- Bake scones in the oven for 14 – 16 minutes, or until the bottoms are lightly golden brown. Remove from the oven and cool completely on a cooling rack before glazing.
- To make the glaze: Combine the powdered sugar, vanilla, orange zest, and juice in a small bowl and whisk till smooth. Add the chopped ginger pieces and mix again. Drizzle over cooled scones and enjoy.
Notes
- The biggest tip here is the make sure your ingredients are COLD. Freezing and grating butter is a big trick to doing this.
- Use a Microplane grater to zest the orange.
- Chop the candied ginger into small pieces but not too small so that you can get a taste of the goodness.
- Do not over-mix the scone dough.
- If you use a biscuit cutter for the scones, do not “twist” the cutter from the dough. This will seal the edges and your scones won’t be as flaky.
- Try adding some bits of chopped dark chocolate to the dough. Orange and chocolate pair well.
Nutritional Disclaimer
“Blogghetti” is not a dietician or nutritionist, and any nutritional information shared is an estimate. If calorie count and other nutritional values are important to you, we recommend running the ingredients through whichever online nutritional calculator you prefer. Calories and other nutritional values can vary quite a bit depending on which brands were used.
The sweet and spicy bite of candied ginger paired with the fresh, citrusy flavor of orange make this combination irresistible.

All About Baking
- Chocolate Pecan Banana Bread from That Recipe
- Chunky Oatmeal Date Cookies from Palatable Pastime
- Key Lemon Pie from Art of Natural Living
- Orange Poppy Seed Bread from Hezzi-D’s Books and Cooks
- Pizza Burger Bomb from A Kitchen Hoor’s Adventures
- Popovers from Karen’s Kitchen Stories
We share Recipes From Our Dinner Table! Join our group and share your recipes, too! While you’re at it, join our Pinterest board, too!
Connect with Blogghetti
Be Sure To Follow Me On My Social Media, So You Never Miss A Post!
Facebook | Twitter | Pinterest | Instagram
If you try a recipe, please use the hashtag #Blogghetti on INSTAGRAM for a chance to be featured!
Enjoy!


Orange and ginger flavors together sounds so intriguing. These are gorgeous.
Scones are my jam! Candied ginger with orange sounds amazing!
Hugh fan of both scones and ginger, which is so good with orange–yum!
Yes to all the candied ginger baked goods! These scones look so moist and perfectly delicious.